Physical Address
304 North Cardinal St.
Dorchester Center, MA 02124
Physical Address
304 North Cardinal St.
Dorchester Center, MA 02124
Elegoo is known for their resin 3D printers which utilize LCD photocuring technology to print models, however, they have also been producing FDM-style 3D printers under their Neptune series.
Elegoo Neptune 2 is one of those printers and we were excited to try it out to see what’s different about it in comparison to other FDM printers, especially since Elegoo makes great resin 3D printers.
The first thing we noted was that the feature set/printing system of the ELegoo Neptune 2 is almost similar to that of Creality’s Ender 3 model. The build volume (standard 220 x 220 x 250mm), extruder, tool head, and hot end are all practically similar to the Ender 3 model.
Where it really starts to stand out is in the details such as supporting more filament types, not using a glass bed, providing a slightly better slicer, and utilizing a different and actually better firmware. It also comes with some nice advanced features like filament run-out sensor and resume-printing function. These are convenient features you don’t get on budget printers like this one.
The ELegoo Neptune 2 does have some drawbacks though and the most notable one is that the print bed isn’t magnetic or auto-level – you have to level it manually which can be tedious as you have to do it regularly. The other one is that the user interface is slightly sluggish and the iconography used is equally a bit confusing.
We were, however, not disappointed at all with regards to performance. We’ve used it for a few weeks now and we were just as delighted as we were with Elegoo’s resin printers. It prints really well. We managed to get great quality prints right out of the box – all our test prints came out looking gorgeous without even tweaking the settings. Here’s more of what we discovered over the short period we’ve used it.
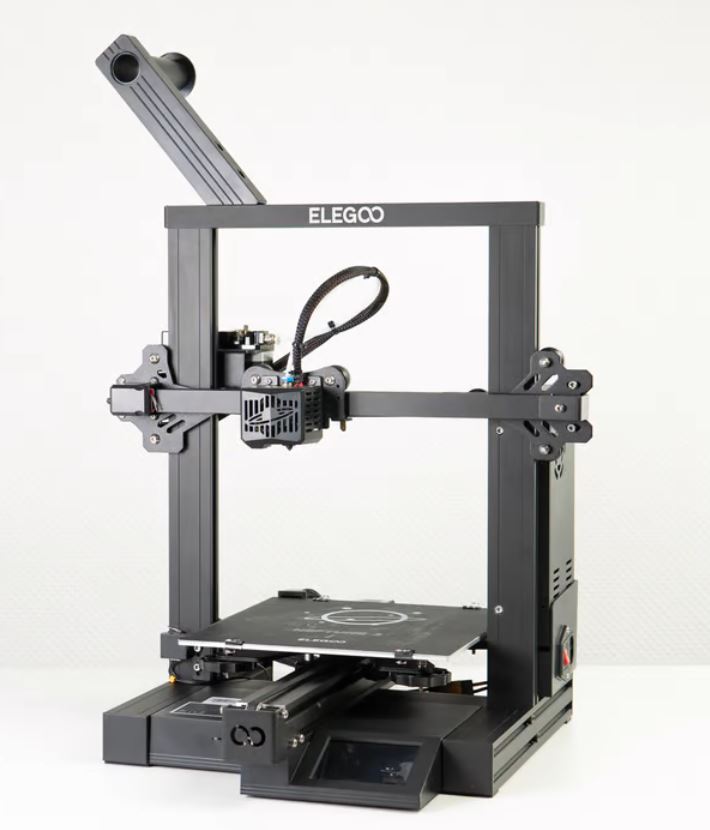
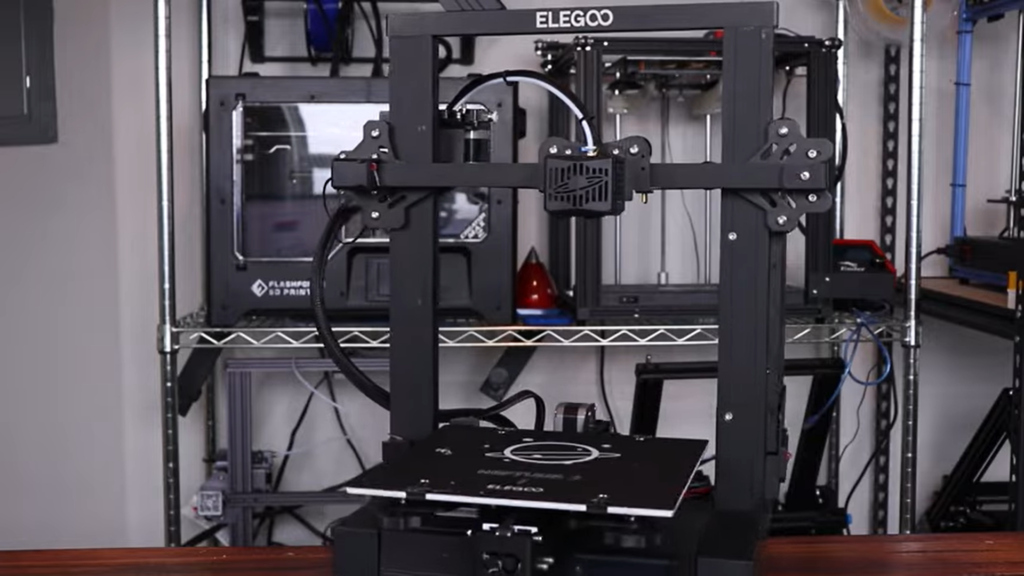
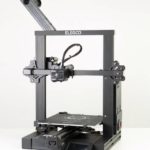
From the first glance, the Elegoo Neptune 2 is, inherently, a basic FDM 3D printer. There’s nothing complicated about its design. It features the usual Cartesian-XZ mechanical arrangement with an open-frame design – it’s almost similar to Creality’s Ender 3 Pro model.
The printer is mainly made up of an aluminum extrusion frame with the power supply mounted at the back, a Bowden-style extruder (basic MK8-style hot end), and a controller board mounted just underneath the build platform.
The aluminum extrusions on the Elegoo Neptune 2 also utilize V-guide rollers on the sides – they have a sleek, matte black finish that looks quite appealing. The frame is unslotted on its front-facing surfaces, which makes the machine appear clean and professional.
Elegoo has really tried to line up everything nicely to keep the printer neat. Most of the wiring and cables are enclosed in the controller board, hence are out of sight. The only wiring that pokes out is the filament feed tube as well as the cable that goes right to the top of the extruder.
Despite that, we found the overall appearance of the Neptune 2 to be generally neat. Elegoo even provides several zip-ties for cable management which is a welcome addition if you are a perfectionist seeking a very clean wiring job.
You’ll also be pleased to see that the strain relief takes the load off cables that provide power to the heated bed – in the Creality Ender 3, for example, the power wires that go to the print bed are totally exposed which not only gave off that obvious DIY-look that Cartesian-style printers usually exude but also posed a safety concern.
However, even our Elegoo Neptune 2 model had an exposed solder that we’d consider covering with Kapton tape, especially because the sheath had been stripped back such that we could see the copper peeking through.
That said, one thing we liked about the design of the Neptune 2 is that the bottom plate is easily removable hence you are able to access the internals of the controller board which makes it much easier to check things over for maintenance or do some upgrading.
The wiring job itself on the inside is top-notch – all the cables are bundled and zip-tied to enable proper airflow across the board. Elegoo has also included a cooling fan that’s mounted such that the airflow passes directly across the stepper drivers so as to decrease their temperature as well as improve their lifespan.
We were really impressed with the great attention to detail in this printer, including the addition of small amounts of adhesive on various terminals to ensure that they don’t come loose during shipping or printing. Elegoo has even added a silicone sock to the hot end to protect it from filament build which is always a welcome inclusion.
Sitting shotgun to the Bowden-style extruder is a little black box which is the filament run-out sensor. We liked how it’s cleverly mounted on the extruder module such that it’s directly in line with it and close enough to not cause any problems during printing.
We also liked the LCD on this Elegoo model compared to that on the Ender 3 model. It’s larger and pushed out front and center, thereby keeping the printer square and compact – it doesn’t extend to the side like the display on the Ender 3. It’s also a touchscreen display; there are no knobs, buttons, or other interface hardware.
The whole unit has a pretty compact footprint (measures 16.9 x 16.8 x 18.1 inches), with the controlled board confined to a small box positioned at the front while the power supply stands up at the back mounted on the frame. It generally takes up relatively small space when placed on a table.
However, the filament spool sits at the top of the printer, hanging over the side which adds about 3.5 inches on the side at the printer’s top. It makes it slightly taller but not bulky.
The printer’s build quality is equally very well done. It’s an all-metal body as the frame is made of CNC machined aluminum while the V-rollers are made of German POM material. It’s a very sturdy machine even with the filament spool attached to the top.
We managed to print several models and throughout our tests, we didn’t experience any variations and deviations, except for the first print and this was due to wobbling in the base which we noted and immediately corrected.
The only part that doesn’t seem it can hold up for long is the print bed. It’s made of fiberglass that’s held in place by four binder clips and topped with a BuildTak-like mat to help with print adhesion.
In the short time we’ve used it, we could see well-adhered prints degrading it before our eyes. After removing a few prints from the print bed, we noticed several light spots emerging on the underside. They were tiny bubbles that had formed between the fiberglass board and the black BuildTak-like mat.
They appeared whenever the mat was stretched or bent to remove the prints and had corresponding high spots right on the top part of the mat which created an uneven surface that made printing long, flat parts challenging. That’s the only major quality issue we noted with this Elegoo FDM printer.
Generally, the build and overall design are decent. Apart from the build platform (which you may have to replace frequently) the rest of the unit is well built and durable.
The open-frame design allows you to view your prints as they unfold which is an experience you couldn’t get with Elegoo’s resin printers due to the red acrylic UV-hood that covered the entire printing area. The only downside is that you can’t use the printer around children or pets because the hot print bed and print head are all exposed, and children can end up touching them and getting burned.
The movement on all the axes is also stable and precise. The print head, attached to rods and belts, moves up and down (along the Z-axis), and left and right (along the X-axis) while the print bed moves forward and back (along the Y-axis).
We tested several of Elegoo’s resin printers and the quality of the prints they produced was very impressive, so we had high hopes when we first put together the Neptune 2 as we expected it to be good as well. We weren’t disappointed. The Neptune 2 prints really well. Despite it being an FDM printer, the print quality was outstanding right out of the box – we got great results without tweaking the settings or doing any hardware modifications or upgrading.
The single Bowden-style/MK8-style extruder utilizes a 0.4mm nozzle (which can be replaced with 0.2mm and 0.3mm nozzles) and it can heat up to 260°C (500°F) which is sufficient temperature to handle different types of filaments.
The nozzle offers 0.1 to 0.4mm layer resolution, which is equally decent. With an XY precision of 0.012mm and Z precision of 0.001mm, the Neptune is very capable of printing well-detailed objects and that was pretty evident in the couple of test prints we did.
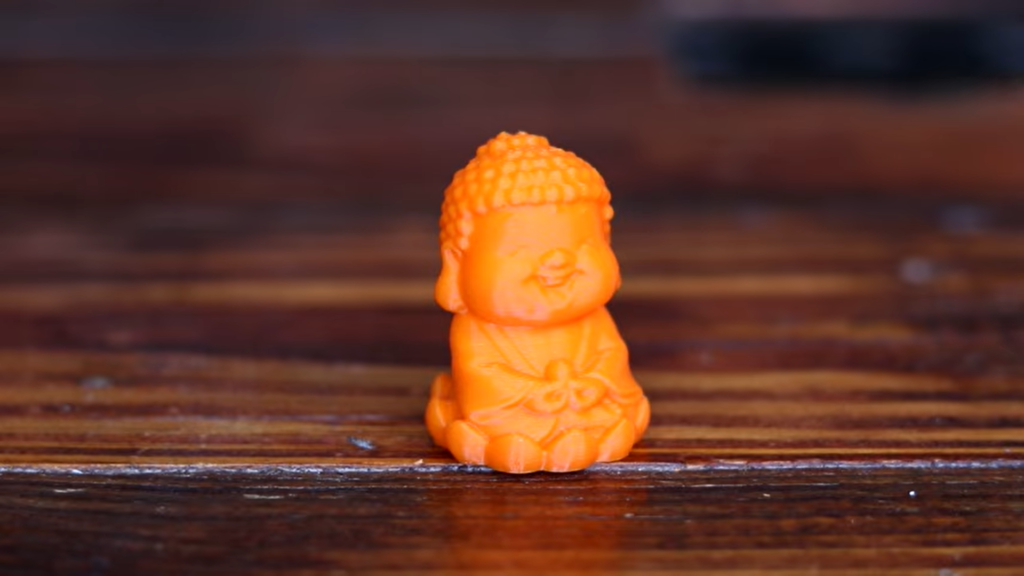
We started with the included test g-code file in the microSD card, which was a small Buddha model. In this case, we printed at the default settings for PLA on the Elegoo Neptune 2, which was a standard layer height of 0.2mm, 50°C for the print bed, and 200°C for the hot end. The file was already sliced with an ideal number of bottom layers (6).
Using the Polymaker Polylite orange PLA filament, I loaded the file and hit print. The printing process was refreshingly uneventful and after an hour and a half, the print was done but the result wasn’t quite impressive.
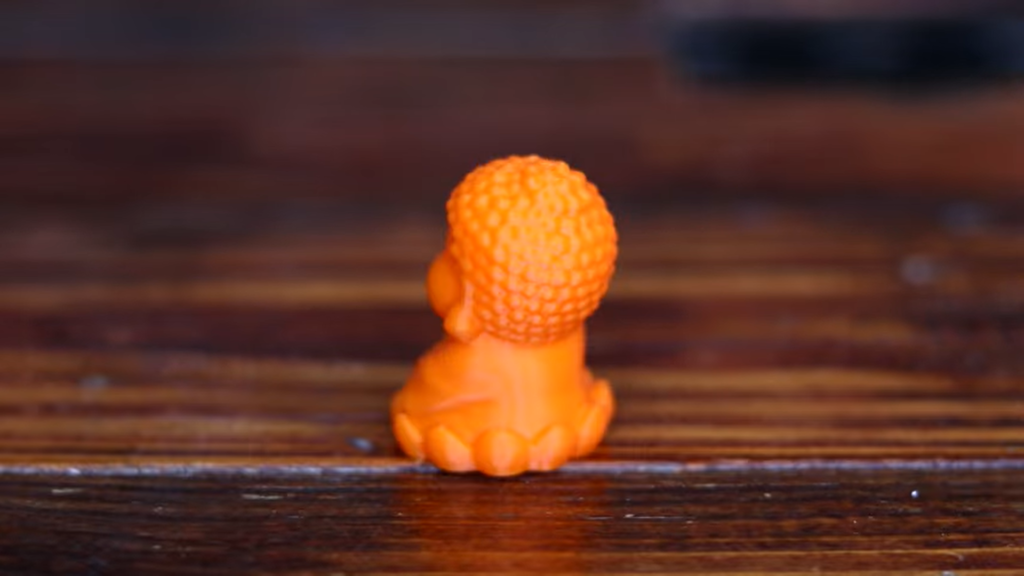
The Buddha was a little crooked at the head. We noted the problem was with the synchronous belt as they were slightly loose which made the print a little off-sided. We tensioned the belt a little bit more to tighten it and gave the test print another try.
That little fine-tuning seemed to have cured the problem because we had asymmetrical print. The Buddha came out almost perfectly. All the details were sharp, even the steepest overhang under its chin printed without any stringing or any material drooping. Overall, we were very pleased with the quality of the Buddha test print, especially the high level of detail it had.
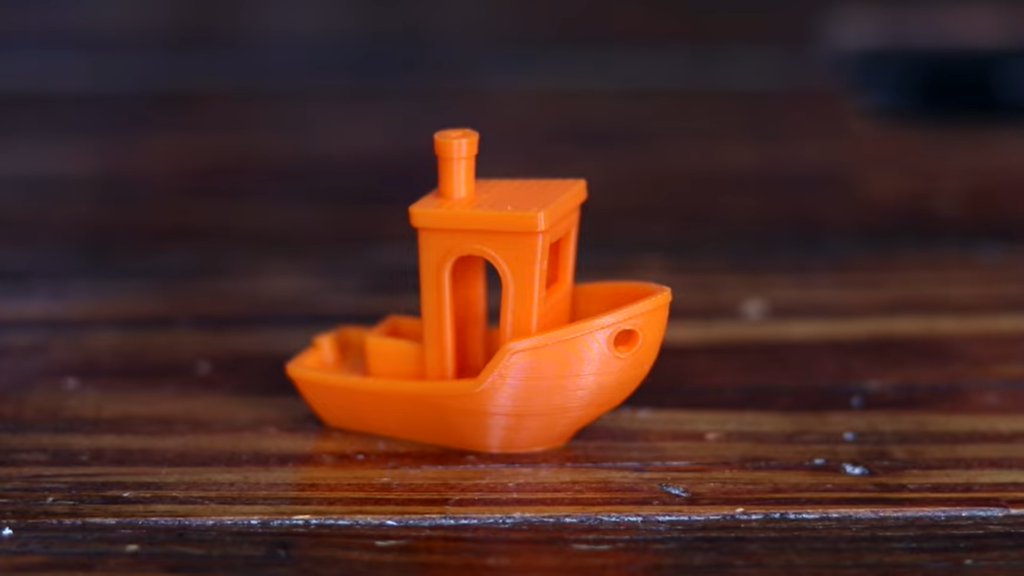
Our second print was a Benchy which is actually the industry standard for testing the default settings on any new 3D printer, and that’s what we actually intended to do in our second test with the Elegoo Neptune 2.
We used the same default settings (0.2mm layer height, 50°C for the print bed, and 200°C for the hot end) and the same Polymaker Polylite orange PLA filament with a build speed of 50mm/sec.
The Benchy model came out great with a generally even finish. There was no unwanted stringing or odd blobs around the front end. Fine details like the bow of the ship, the box on the deck, the rectangular front window, and cylindrical hole, and the outer part of the chimney were all reproduced quite well.
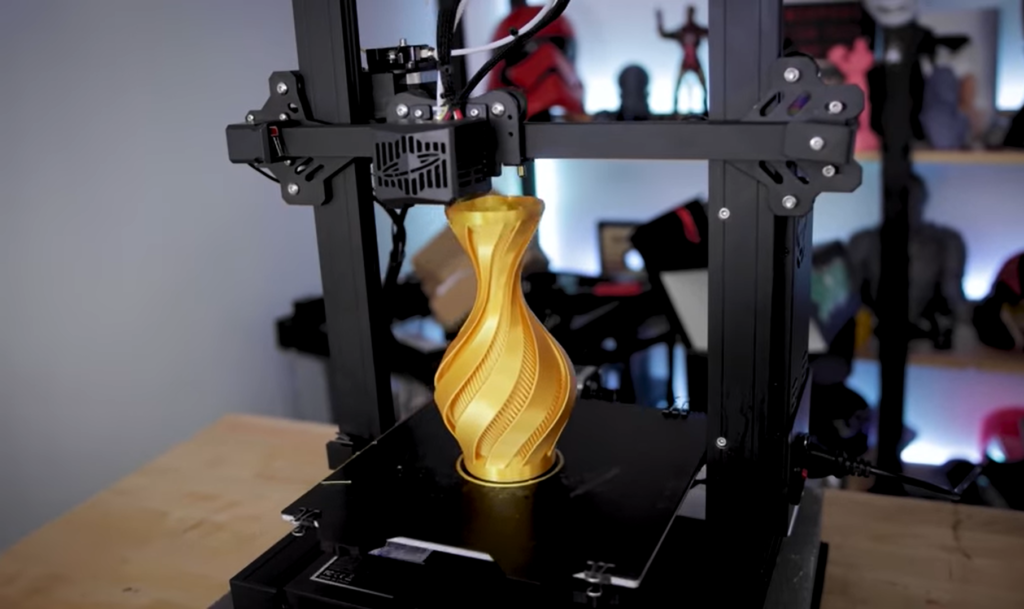
One amazing feature that the Elegoo Cura offers is “Spiralize Outer Contour”. It prints a model as a hollow shell and increases the Z height incrementally as the print progresses.
It’s a special mode that enables the printer to create tall objects quickly because of the lack of layer changes as well as the toolpath’s spiral nature. The reciprocal vase model by Clockspring3D is a good example of a model that can work with this style and we put it to test just to see how well the Neptune 2 would reproduce it.
We used MCHYI Silk Gold PLA filament and the printer did a quick work of it printing it in around three and half hours which was pretty impressive. The vase came out perfect. The surface finish was very fine like it was printed on a resin printer – there was no sagging or material drooping at any part/point on the model. All the details were precise and well reproduced.
Having tried out the Spiralize Outer Contour mode with great success, we decided to give it another try by printing a Cycloidic vase from Thingiverse and it came out perfect too. The layers laminated together pretty well, plus the vase had a slight flex to it when squeezed without deforming or cracking. The fairly large footprint of the vase was completely flat with no warping or curling.
In general, we were very satisfied with the performance and the quality of prints that the Neptune 2 produced. It’s an outstanding printer considering its low cost. It gives very good detail and no single print we made had any stringing or material drooping. Even overhangs and shallow curves came out printed perfectly yet these are areas that typically suffer, especially when using large layers.
The only crooked print we had was our first print of the Buddha model but the cause was a small issue that we fixed by tightening the synchronous belt. Once that was done, all the other models we did came out perfectly without any tinkering. We run them on stock settings but we found that you can as well tweak the Elegoo’s Cura slicer to produce even better results.
The printing speed of the Neptune 2 is relatively fast compared to most other similar printers in the same price range. It’s able to print at a speed of up to 180 mm/s with the normal speed ranging from 30 to 60 mm/s.
In comparison, most standard budget printers like this tend to have an average maximum printing speed of 150 mm/s with a normal speed range of 20 to 50 or 55 mm/s. The difference isn’t large but it’s noticeable, especially when doing large prints that take longer to complete.
The Benchy model, for instance, is a short print and the Neptune completed it in just one hour and a half with the build speed set at 50 mm/s. The same print on a similar kind of printer like the FLSUN Q5 Delta would take over 2 hours to print.
The Buddha model which was the shortest print on our test was done in one hour and thirteen minutes. It could take up to one hour and a half to print it if it was on another machine.
The reciprocal vase which was one of our longest prints took just 3 hours and 30 minutes to complete which we found pretty impressive considering that it has a height of 117mm/4.6 inches. So generally, Neptune’s 2 printing speed isn’t the fastest on the market, but for a budget printer, it’s impressive.
You get a decent build volume with the Neptune 2 which is around 220 x 220 x 250 mm – it’s basically the same print volume that the Creality Ender 3 offers and also most of the other 3D printers in this price range. The space is enough to accommodate small to large models, so you can almost experiment with anything you want.
The print bed itself is removable and semi-flexible, made of fiberglass with a BuildTak-like mat applied to the top. It’s not magnetic, instead, it’s held in place with four small binder clips – it sits right between the solid glass print bed of Creality Ender 3 V2 and the flexible print bed of the Ender 3 Pro model.
The bed is heated up to 100°C which is one of its major highlights because it allows the Neptune 2 to handle tricky materials like ABS without worrying about issues like warping and shrinking. During printing, the bed is heated from below which enhances its adhesion properties hence allowing the first few layers of a print to stick to the platform without being knocked off and also resist shrinking due to cooling.
The textured surface of the BuildTak-like mat added to the top of the print bed also further enhances its adhesion properties. Every print we did stick to the surface very well – you won’t need glue or masking tape.
Removing the prints once they were done wasn’t much of a hassle either because the print bed is removable and semi-flexible. You just remove it and bend it slightly to allow the print to pop off the plate. We had no problems whatsoever when it came to removing the prints, even those that seemed extremely stuck came off without putting in a lot of effort or force.
Removing large printed parts can be slightly difficult though since the mat is a bit thick (1.5 mm) and semi-flexible – it isn’t a fully flexible mat. In comparison, the build platform on the Creality Ender 3 model is a fully flexible magnetic removable mat with an average thickness of 1mm. It allows large printed parts to be removed easily – you can bend it completely and pop the parts off, something which isn’t quite possible with the Neptune 2 build platform.
The other downside as we had mentioned earlier is that the build platform is not that durable. After removing several prints we noticed that some light spots were starting to develop on the underside of the platform. The prints seem to pull the fiberglass bed material and the sticker/mat on top of it apart causing tiny bubbles to appear between them.
Over time, these bubbles can create corresponding high spots on the surface of the mat which can make printing parts that are long and flat challenging because of the uneven surface present.
Besides that, you can expect at some point the bed to become pocked with hills and troughs as the sticker continues working itself loose over time which would render it useless – so it’s highly likely that you might have to replace the Neptune 2 build platform frequently, especially if you’ll be printing regularly.
With a heated bed that can go up to 100°C (212°F) and a hot end that can heat up to 260°C (500°F), the Neptune 2 is plenty hot enough to work with a variety of materials provided they are 1.75mm in diameter. You can print with everyday filaments like PLA and PETG as well as tricky filaments such as ABS, marble, and wood.
You might have some success with flexibles like TPU, but nothing too soft because the extruder is the typical MK8 type, which is not really well equipped to handle very soft filaments.
We didn’t get to try it but those who did report that it’s challenging to even load the filament in the extruder – the pinch point of the material is always a little offset from the opening all way to the Bowden tube, so even a slight bend in the filament made it difficult to enter into the Bowden tube.
Materials like ABS which require a consistent temperature to print successfully can be a bit tricky to use too due to the open-frame design of the printer. The build area is exposed hence it’s hard to keep a consistent temperature which is necessary for successful printing with ABS or PETG.
The printer ships with a small bag featuring 5 meters of white PLA filament that’s just enough to print the Buddha sample model included in the provided microSD card. You can use both Elegoo and third-party filaments. In our tests, we used Polymaker Polylite orange PLA filament and also MCHYI Silk Gold PLA filament which are both third-party filaments and they worked pretty well.
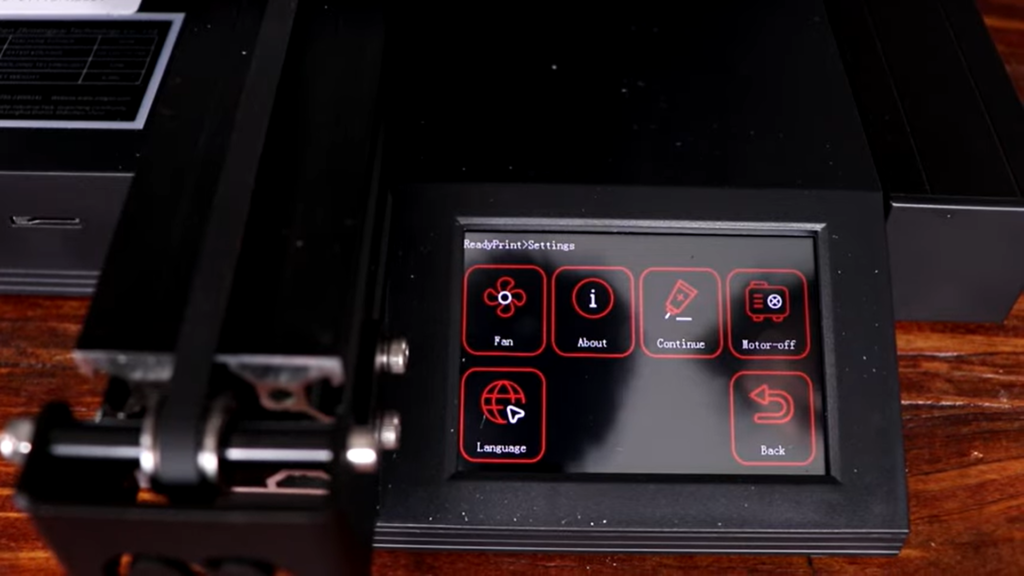
The Elegoo Neptune 2 comes with a 3.5-inch color touchscreen positioned on the front and center, not protruding to the side like is the case with the one on the Ender 3. This design as we stated before helps keep the footprint of the printer square and compact.
That said, the touchscreen display is the only user interface offered by the machine beside the power switch. There are no knobs, buttons, or other interface hardware. The user interface has some simplicity to it that almost mirrors the company’s resin 3D printers, particularly the simplified iconography and menu layouts.
However, while we appreciated the simplicity of the user interface, it wasn’t particularly pleasant to interact with. It felt clunky and confusing. The “Move” menu is an especially egregious example.
Besides that, the iconography/many of the symbols used in most of the menus are unhelpful and confusing. For instance, the “Close” icon uses the common symbol for power yet hitting it resets the values to zero. The user manual does explain the functions of most of them, but in practice, we found using the printer quite confusing and on many occasions forcing extra movements in order to achieve the desired operation.
We often had to go back through previous menus to find the icon we wanted which was frustrating and led to lost time– someone unfamiliar with 3D printing will certainly have a hard time understanding and using the UI.
Another issue we noted is that there’s no active overview of the printer’s status like when it’s idle, if it’s hot, cooling, etc. It’s hard to know how hot the printer is or isn’t after preheating, which is the kind of information you would want to have as it can give you a clue when something is wrong with the machine.
Starting a printing process is rather simple though as you just select “Print” in the menu, then pick the model you want to print, and press “Start”. From there, the bed and nozzle will start heating up, depending on the settings you made in the Cura software.
The other cool thing is that you get to preview the print/image of the model you wish to print which is a pretty convenient feature that makes selecting the right model much easier compared to just seeing file names scrolling across the screen. It’s particularly useful when you’ve got your microSD card loaded with gcode files and you just want to print “that one particular thing”.
The printer as well offers a print resume function which is yet another useful feature. If there’s an expected power outage or some faulty operation in the middle of a print job, then your 3D model won’t fail – the machine immediately pauses the operation until the error is corrected or the power comes back in case of a power outage. It saves the progress and starts right from where it stopped printing.
The MK8 extruder is also equipped with a filament detection sensor, so the machine pauses printing too when filament runs out and resumes from where it stopped once a new filament is loaded.
With regards to the response of the touchscreen display, we were a bit disappointed because it was slightly sluggish for our liking. A beat passes before the system reacts to your tapping of a particular option or rendering the next menu.
The dark user interface is difficult to read too when the print bed extends over the screen, which always happens during printing. The other drawback to the touchscreen is the fact that it picks up fingerprints easily, meaning you’ll be cleaning it often.
Your default method of uploading prints is using the provided SD card which allows you to print offline. The unit also comes with a USB port that allows you to connect and load your design to the printer from your computer – however, the printing process can only be initiated from the onboard touchscreen.
Elegoo provides a slicer program called Elegoo Cura with the Neptune 2 which is actually an Elegoo branded version of Cura, skinned/customized to offer first-party native support or rather a more streamlined experience when set up with the Neptune 2.
As you may know, Cura is a robust software that supports many 3D printers and has a large and very active user base. It’s a powerful slicing engine that’s packed with lots of parameters for customizing prints.
However, the way Elegoo has adapted Cura is quite different from the other skinned versions from other brands like Creality’s and Ultimaker’s Cura. The Elegoo’s Cura is actually usable in almost every aspect which made it our go-to-slicer in our Neptune 2 tests.
The big difference to the other versions is that you are able to use all the profiles – the different profiles for both layer heights and materials work without giving you warnings which is super convenient. It seems the profiles have been a bit tuned to the Neptune 2 because most of the prints, if not all, came out excellent without much tweaking of the settings.
Moreover, similar to the vanilla version of Cura, the Elegoo’s Cura has several different modes that are aimed at users of different experience levels. For instance, the Basic mode offers only a few parameters to adjust while in the Expert mode, you get more options – you can adjust everything including the cooling fan’s speed and the filament retraction distance and speed.
The Elegoo’s Cura also provides a full-time report once every model is sliced, so you get enough information to be useful as well as actionable without becoming challenging to parse through thoroughly.
For example, in addition to the material usage and print time figures, the Elegoo’s Cura offers a detailed breakdown of where exactly the printer is spending time throughout the printing process – after slicing a 3D model, it can show the percentage of time the printer will spend on the infill and the inner walls of a print.
This type of analysis/information is very beneficial to more advanced users as you can refer to such estimates when trying to reduce the total print time or when optimizing a part.
Overall, we found the Elegoo’s Cura to be great for both advanced users and beginners, plus you get full access to the Ultimaker’s Cura marketplace for further enhancements like additional tooltips. But, if you prefer using a different slicer, then you’ll have no problem either because Elegoo hasn’t limited the Neptune 2 to only their Cura version. You can use your preferred slicer whether it’s Simplify3D or Repetier-host.
The printer supports .stl, .obj, and .amf file formats and the provided Elegoo’s Cura is compatible with all the common operating systems; Linux, Mac OSX, or Windows.
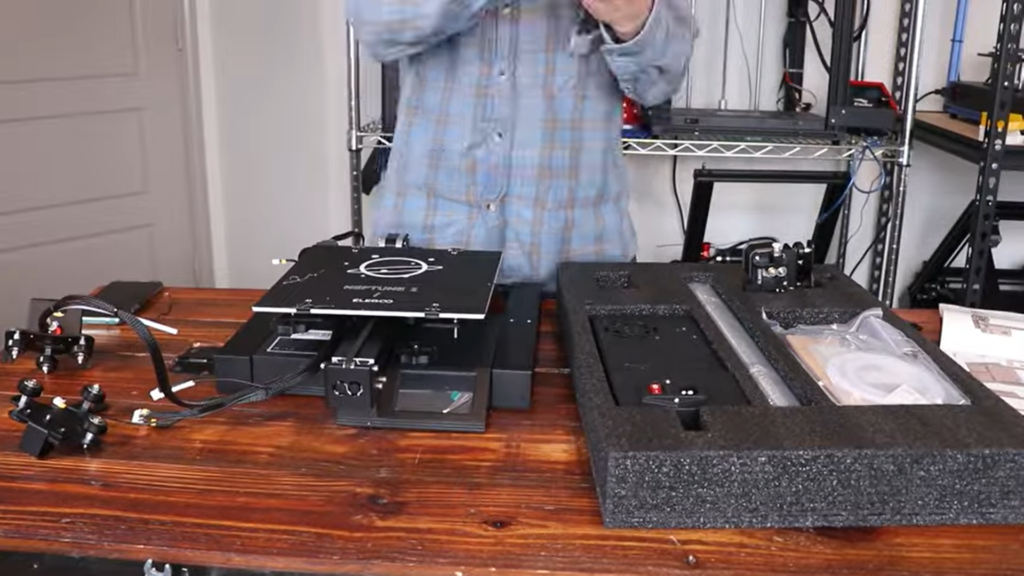
We were a bit surprised when we received the Neptune 2 because of how small its box is, especially considering that most of the FDM printers we previously tested came in bulky boxes – the Neptune 2 was barely a footstool because it doesn’t come in one piece.
Opening this diminutive box, we found two neatly arranged foam trays that shrouded all the components and accessories necessary to set up the Neptune 2. Just like with the Mars Pro, the different components were very securely packed in the box, covered again by an additional foam sheet. They were all in good shape, a testament to how the packing did a good job of protecting them during shipping.
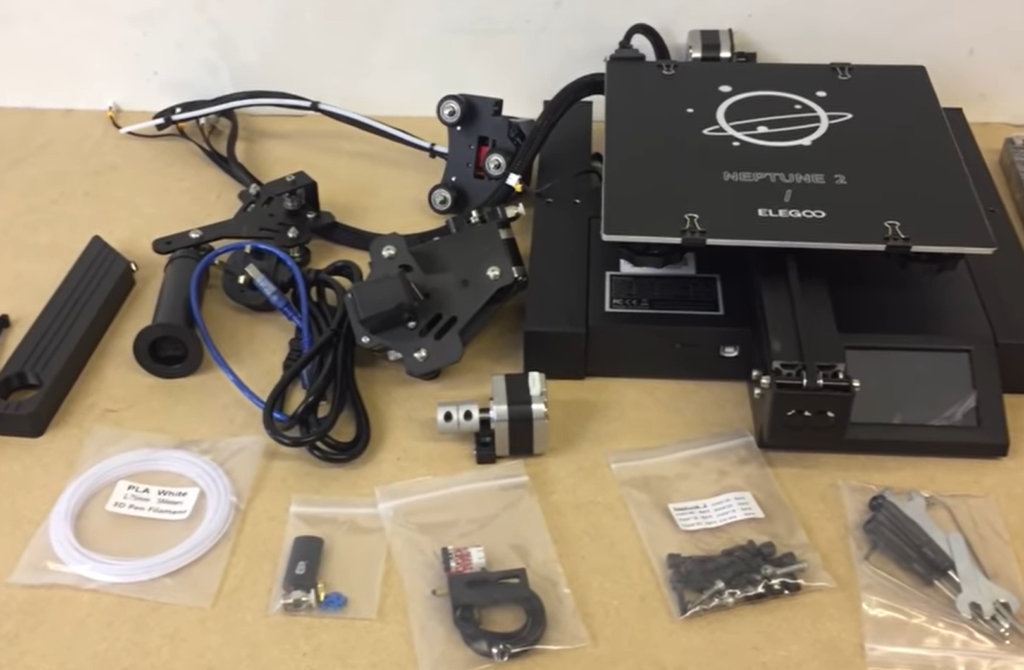
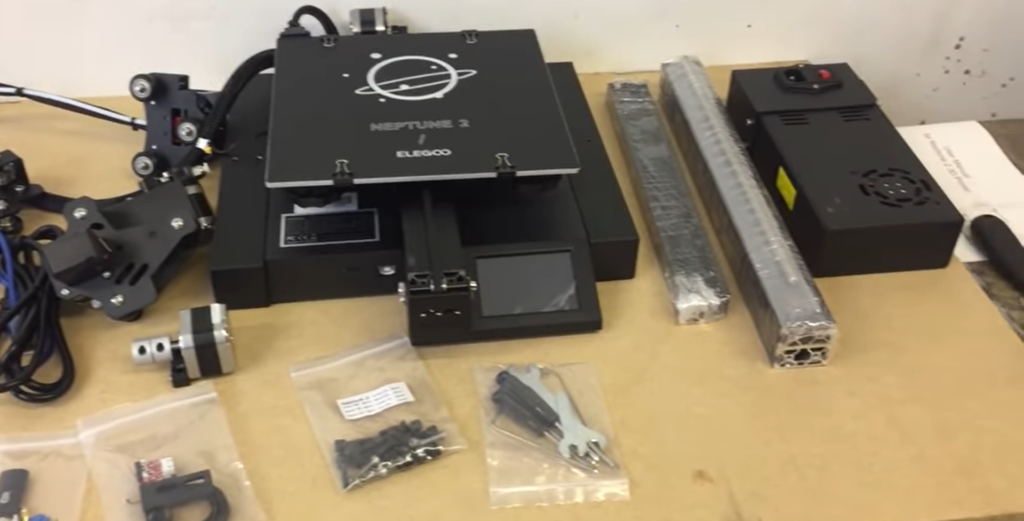
Elegoo had already assembled some of the sub-modules (Z motor, Z endstop, extruder, base unit, etc.), so piecing together the printer wasn’t that difficult even though the way it was broken down to individual parts made it look daunting.
We wouldn’t really say it’s a full DIY kit printer but the assembly required is enough to give you some knowledge of how an FDM 3D printer works if you are a first-timer. You have to build up the frame as well as assemble the X-axis gantry which was probably the most time-consuming step.
The user manual offers instructions on how to carry out the assembly with multiple illustrations and diagrams at every step, so you won’t have any problem following along.
The wiring harness has been clearly labeled with each cable featuring a tag that denoted where it should be inserted. We were really pleased with the attention to detail here because it can be a confusing process, especially if you’ve never connected such a harness before.
The instruction manual provides detailed callouts for each endstop, motor, and all connections. Moreover, all the wires have been terminated, plus there’s no soldering or any electrical work needed during the assembly.
We were proceeding slowly, and it took us around 30 minutes to build up the printer. However, it was far from ready to run once assembled. Despite doing everything right, we ended up with an uneven printer that wobbled in the base (which is factory assembled) – it wasn’t tightened flat which caused it to rock when set onto a flat surface.
We noted this during our first print and immediately corrected it by loosening each of the side extrusion screws and then tightening them again – that way, the printer’s base aluminum extrusions got aligned well with the table. Still, though, it could really use the adjustable feet we saw on the mars.
Another issue we noted was that the knobs and springs for leveling the print bed seem to come loose presumably during shipping, so you have to tighten them up to ensure all is well again.
You need to especially ensure you’ve tensioned the drive belts properly. The X and Y axes trolley wheels were completely loose when we set up the unit, so they needed to be tightened. It’s a simple fix using the eccentric nuts, but it’s rather disappointing that none of these corrective steps are mentioned in the instructions yet if not corrected could result in crooked prints and a frustrating time, especially for a 3D printing newbie.
The other very important bit of information that was missing from the manual was to set the power supply to the right voltage based on which part of the world you are in. Our unit was sent with the power supply set incorrectly. It was set at 220V, not 110V.
For a printer that was shipped to the US, it should have been set to 110V at the time of manufacturing, not 220V which is what is used in Europe or China.
The power supply can operate on either 220V or 110V, so if you are in the US, you’ll need to set it to 110V, otherwise, the printer might not turn on, or worse, the power supply might short out. It’s again an easy fix but just like the V-slot rollers being loose, this is a problem that many users, particularly beginners won’t be looking for.
Generally, assembly wasn’t too difficult except that you must do several fine adjustments once you are done to ensure the printer is set correctly, especially the voltage of the power supply.
The package comes with all the tools and accessories required for assembly, including a complete set of Allen keys, an adjustment wrench, some zip-ties for cable management, and a pair of small screwdrivers. The provided microSD includes the instruction manual in a PDF file format, the Elegoo’s Cura slicing app as well as a video that shows the complete assembly process of the printer.
There’s no auto-leveling with the Elegoo Neptune 2 model. You have to manually level the bed by selecting “leveling” in the tools menu on the screen and adjusting the four thumbscrews under the bed until a piece of paper can move freely underneath the nozzle of the extruder at five different spots on the bed, but with some friction.
The overall experience is similar to the Ender 3 Pro, which utilizes a nearly identical process. It’s not a difficult task but to get it right at first can be a bit tricky because it’s often subjective and inaccurate compared to printers that utilize assisted or auto-leveling systems.
Moreover, similar to many FDM printers at this price range, the print bed springs of the Neptune 2 aren’t really strong enough to keep the bed leveled for long which means you’ll likely have to re-level it almost before each print.
We ran the leveling tool before each of the prints we did during our tests and found out that we had to make adjustments each time. The process takes just a few minutes but it’s well worthwhile – one time we did it fast and ended up having to stop the print because the first layer didn’t go down properly.
Loading the filament is not a difficult process. The only challenging part is getting it to enter the Bowden tube, plus you need to rotate the filament around so that you get it lined up properly and insert it past the feeding motor. There are no instructions to show you how to do this which is unfortunate for those new to 3D printing.
It could be helpful if Elegoo included the information but since it’s not there, the only option you have, if you are a newbie, is to Google the information, and watch videos to know how to properly load the filament into the hot end.
What we liked though is that the printer comes with a filament run-out sensor which isn’t a common feature in most budget 3D printers. The sensor will trigger the printer to automatically pause printing once the filament runs out halfway through a print, allowing you to replace it and continue printing from where it stopped.
It’s a handy feature, especially when doing long prints and you are not sure if the remaining filament is enough to complete a print or when you can’t stick around to keep an eye on the print.
One thing that was appealing about the Neptune 2 is that its motors are quiet, in fact, quieter than most other FDM 3D printers – the noise level is no more than 50db. You can be in the same room with it while it’s running and be able to concentrate on your work without it drawing much attention.
The other one is that it has a power-saving feature in that once a print is finished and the temperature of the nozzle drops below 50°C, the cooling fans that are right behind the nozzle and the ones on the motherboard automatically stop working hence saving power and as well extending their lifespan.
Finally, the Neptune 2 offers a lot of room for enhancements/upgrades. It’s equipped with a Robin Nano V1.2 mainboard (32-bit) which has the necessary ports for a BL-Touch auto-leveling probe/module. The extruder gantry also has two holes pre-drilled where they can be mounted. There’s as well a port for a second extruder or a laser engraver module, should you wish.
These inclusions mean you can modify the Neptune 2 to enhance its performance and usability to your preference which is an exciting prospect if you are using it as the base for your machine. The only thing that we wished Elegoo could have made possible is allowing you to swap the stepper motor drivers.
They have used an off-brand Robin Nano board with integrated stepper motor drivers (soldered to the board), instead of a modular layout which would allow you to swap them out at will. These particular drivers allow silent operation but lack many useful and advanced features which similar drivers offering firmware-configurable variable voltages allow.