Physical Address
304 North Cardinal St.
Dorchester Center, MA 02124
Physical Address
304 North Cardinal St.
Dorchester Center, MA 02124
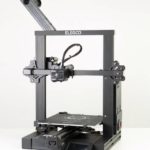
The Mars 2 Pro is the upgraded model of Elegoo’s Mars Pro model and it was released just last year. Its outward appearance remains largely unchanged from the Mars Pro but the core of the printing system sets them apart as it sports a few notable upgrades.
The one that stands out, in particular, is the 6.08-inch monochrome LCD screen for masking. It has no color filter and enables the printer to achieve much faster printing speeds (layer curing times) than the normal LCD displays used on the Mars and Mars Pro.
The Mars 2 Pro also has a more powerful light source. It uses a COB UV LED light source instead of the Matrix UV lighting found on the Mars Pro – it’s a single UV lamp that uses a single lens to scatter the UV light uniformly over the entire surface of the screen. It provides a more uniform light emission and excellent heat dissipation than Matrix UV lighting.
Another major upgrade is the build volume (129 x 80 x 160 mm) which is larger than that of its predecessor (115 x 65 x 150 mm) and the original Mars model (120 x 68 x 155 mm) – it allows you to generate decently sized prints compared to the other models.
Other differences include the print plate coating which is now a coarse, sandblasted texture (like the one on the plate of the original Mars), and the addition of 10 new language choices.
Besides that, the Mars 2 Pro has a slightly higher XY resolution (2560 x 1620 pixels) than its predecessor (2560 x 1440 pixels). However, it’s spread across a larger build area thereby resulting in a reduced pixel density and slightly lower XY resolution at around 50 microns against the Mars Pro’s 47 microns.
All the other features are pretty similar to what the Mars Pro offers including the linear guide rail, set screws, and the touchscreen for controlling the unit.
We managed to get our hands on the Mars 2 Pro as we were eager to put it to test to see if the upgrades had any influence on the printing performance compared to its predecessor, so after spending some time with it here is our detailed take about it from its performance to its overall design, build quality and ease of use.
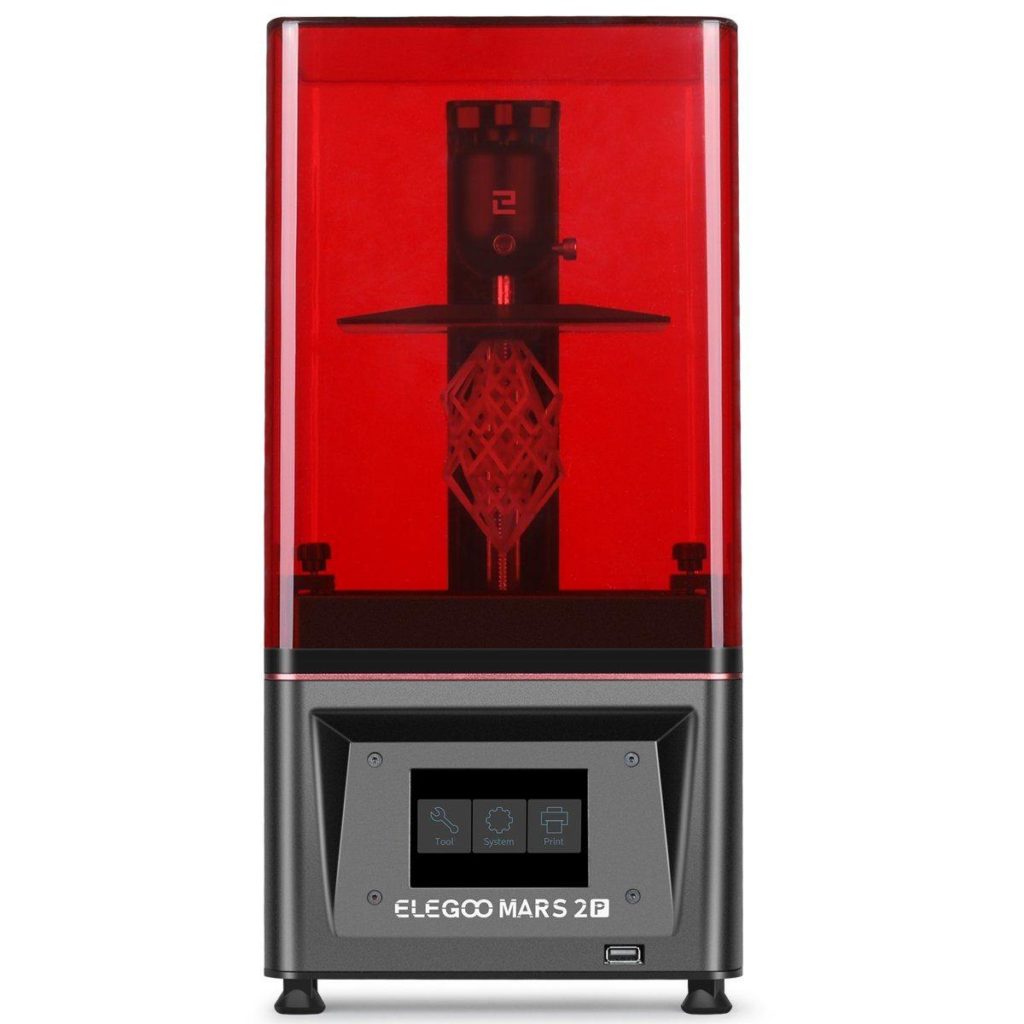
The overall design of the Mars 2 Pro is quite similar to its predecessor. Nothing has been changed at all. It still rocks the same red acrylic UV hood with a rubber gasket that fits over its bottom to ensure a tight seal that keeps odors in. The USB port is conveniently placed on the front too, and a built-in activated carbon has also been included in the base unit to help absorb the resin fumes and facilitate a refreshing printing experience.
The design is basically very similar to the Mars Pro in every aspect – most of the differences lie on the inside because externally you can’t really tell the two apart except for the badge/model name below the control screen. Both printers are even of the same size (7.87 x 7.87 x 16.14 inches) even though the printing plate of the Mars 2 Pro is slightly larger.
We found the build to be of great quality, primarily the printer body and the resin tank. The entire interior including the build platform, the base, guide rail structure, and the resin vat is made of a strong CNC machined aluminum. The build feels very solid and the fact that even the base is metal gives the whole unit a sturdy, bottom-heavy feel.
The build plate’s rotary is equally robust, made of CNC machined aluminum, not plastic like the one on the original Mars model. The build plate also has the same large anti-slip Allen set screws we saw on the Mars Pro, so they offer more stable and long-lasting leveling results. The return of a coarse, sandblasted coating for the build plate is a welcomed upgrade as it makes the plate much stronger than the CD pattern plate of the Mars Pro.
Unfortunately, the LCD screen doesn’t have a tempered glass protector like on the other Mars models. The screens on the Mars and Mars Pro came shielded with an additional layer of tempered glass, but on this Mars 2 Pro model, you use the LCD screen directly without any protective layer which makes it fragile and extremely easy to scratch or get damaged.
Though we haven’t had any problems with ours in our time with the printer, several users on Elegoo’s online forums reported that theirs’ got damaged or failed to work after just a few months while others had theirs scratched, mostly when sliding the vat in or out.
Instead of a top-down resin vat loading mechanism, Elegoo opted for a slide-in vat for this Mars 2 Pro model which many users sighted to be the main cause for most of the scratches as hard objects can accidentally drag across the screen. That’s the only major setback we noted as far as build quality is concerned.
The wiring job inside the machine looks clean and professional – all terminal blocks are securely fastened, plus additional adhesive has been added to the USB terminal which runs to the front section (control panel) of the machine.
As we mentioned earlier, the major difference between the Elegoo Mars 2 Pro and its predecessor is in the printing system which has been upgraded to enhance the printing performance even further.
The LCD screen for masking has been upgraded from the normal LCD display with RGB color filter (used on the Mars and Mars Pro) to a monochrome LCD screen that has no color filter. This new screen offers faster curing speeds but its real transformative quality lies in the light source underneath it.
Unlike the original Mars (which uses a single LED light source with a very simple reflector) and the Mars Pro (which uses an LED array with many tiny individual lenses/reflectors for each LED), the Mars 2 Pro utilizes just a single LED and a single lens, and has an increased distance from the LCD screen to the LED.
This new light source and design spread the light uniformly across the whole surface of the print bed thereby enabling a more even exposure that allows the unit to print the outer edges of models/objects with the same precision as the parts positioned over the center of the screen. Therefore, you get very accurate printing results with extremely smooth edges, much like in the Mars Pro.

However, despite having this upgraded 6-inch monochrome LCD screen, the Mars 2 Pro offers a slightly lower resolution. The screen resolution is 2560 x 1620 pixels which are technically more pixels than that of the Mars Pro (2560 x 1440 pixels) but they are spread across a larger build area which consequently leads to a slight drop in the pixel density.
The outcome of this is an XY resolution of 0.050 mm (50 microns), compared to 0.047mm (47 microns) on the Mars Pro. This 3-micron downgrade is an arguably negligible difference that shouldn’t be visible to the naked eye, but it’s still worth noting because it could matter, especially in some professional applications where precision is paramount.
The Z-axis utilizes the same upgraded linear guide rail structure we saw in the Mars Pro, so the movement during the printing process is consistently steady and accurate throughout.
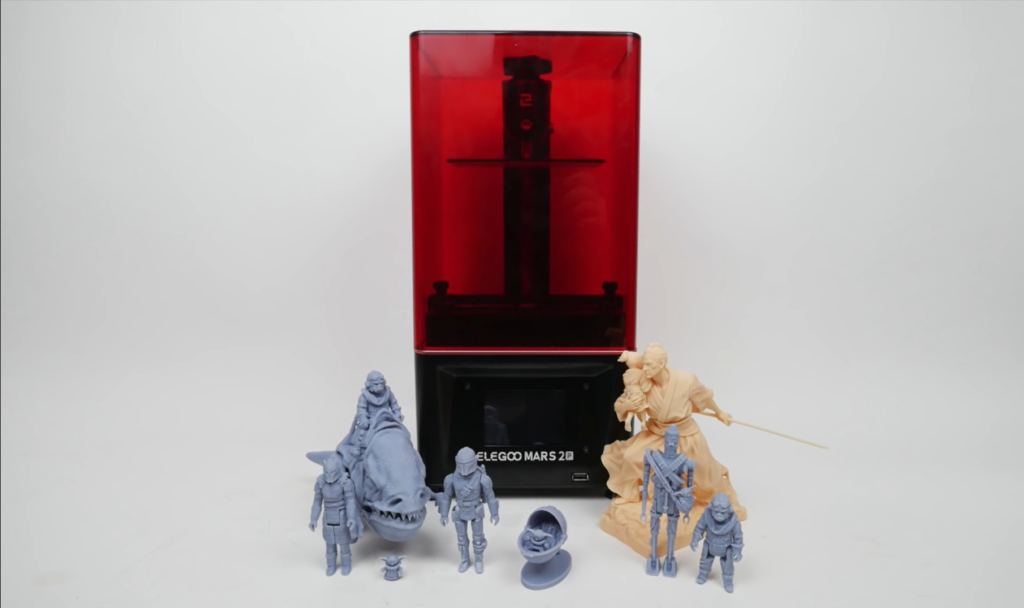
As we expected, the quality of the prints was outstanding with tons of detail and texture just like in the Mars Pro. We began by printing the rook test prints which were included with the Mars 2 Pro like the other previous models.
The two rooks came out flawlessly with crisp and clear lettering – all the fine features inside and outside were reproduced perfectly. Adhesion to the build plate turned out to be quite strong because of their solid bottom but they did pop off with a gentle tap using the included metal spatula.
Our second test was the ultra-popular Star Wars Deathtrooper and the Mars 2 Pro came through again. The model printed flawlessly with exquisite detail. The layer lines were so fine that they were practically invisible despite the LCD screen’s standard resolution of 0.05mm.
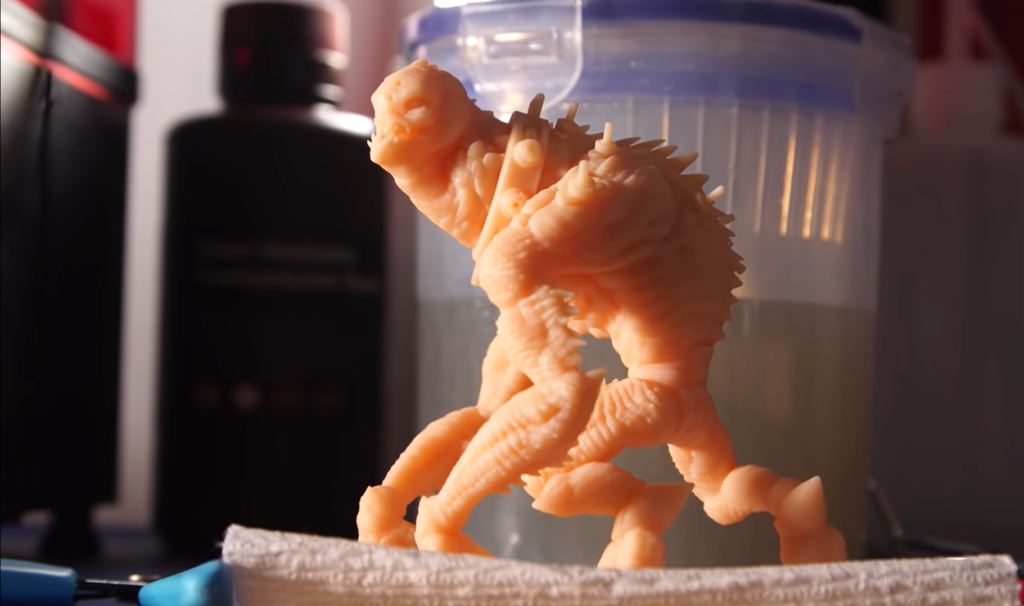
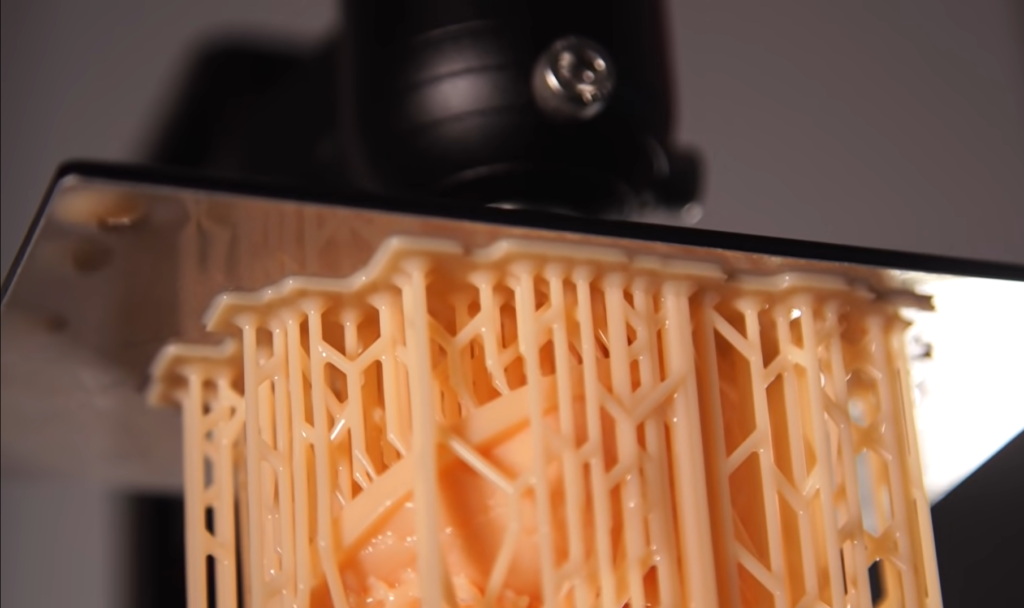
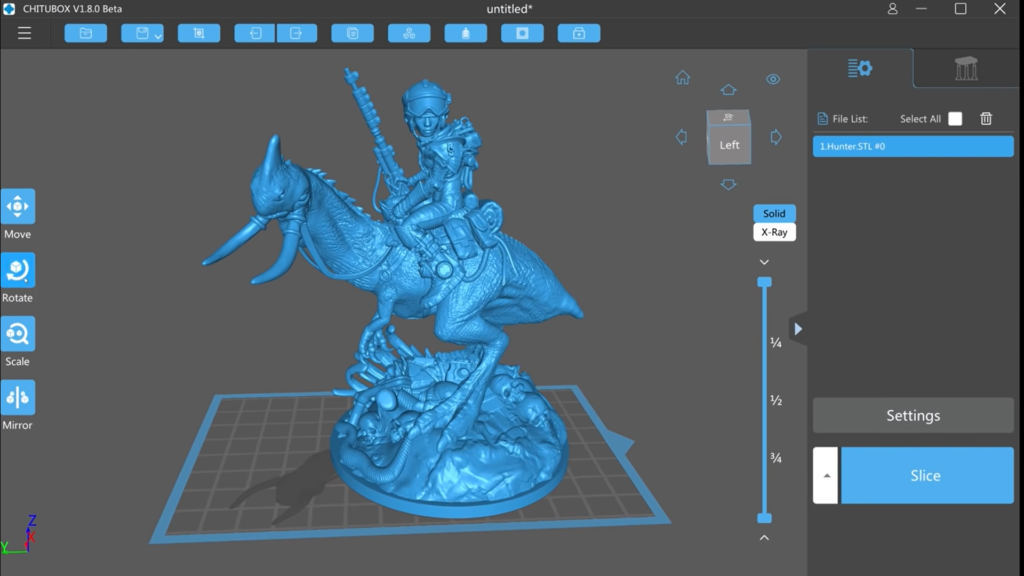
We wanted to test a model that has lots of detail, so we tried Pascal Blanche’s Space Zombie model. We used the cream-colored Siraya Tech fast cure resin for this model and default settings (2.5 exposure time and 0.05mm layer height). It printed perfectly without any problems. The support structures that were generated by CHiTuBox held it to the build plate without any problems, and the LCD captured all the details present in the model very well.
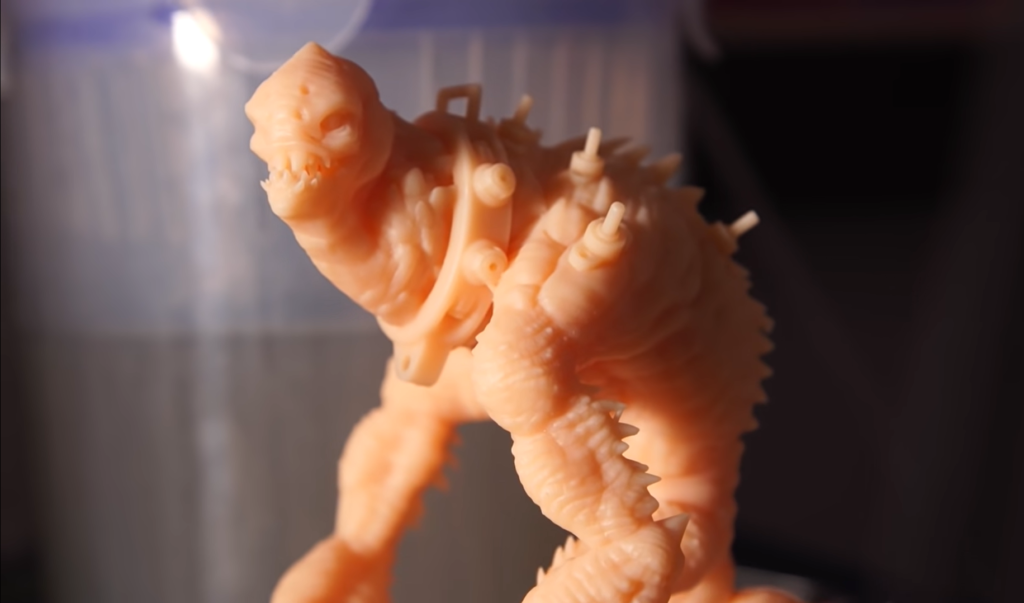
After rinsing it in 99% isopropyl alcohol, the support structure easily detached from the model – I was expecting some resistance in removing the supports but they popped off with no difficulty at all. I washed the excess resin off and what I was left with was an amazingly detailed model.
The marks where the support structure had been attached to the model were virtually non-existent, plus the standard 0.05mm layer resolution created a print with barely visible stepping – its surface was absolutely crisp and smooth.
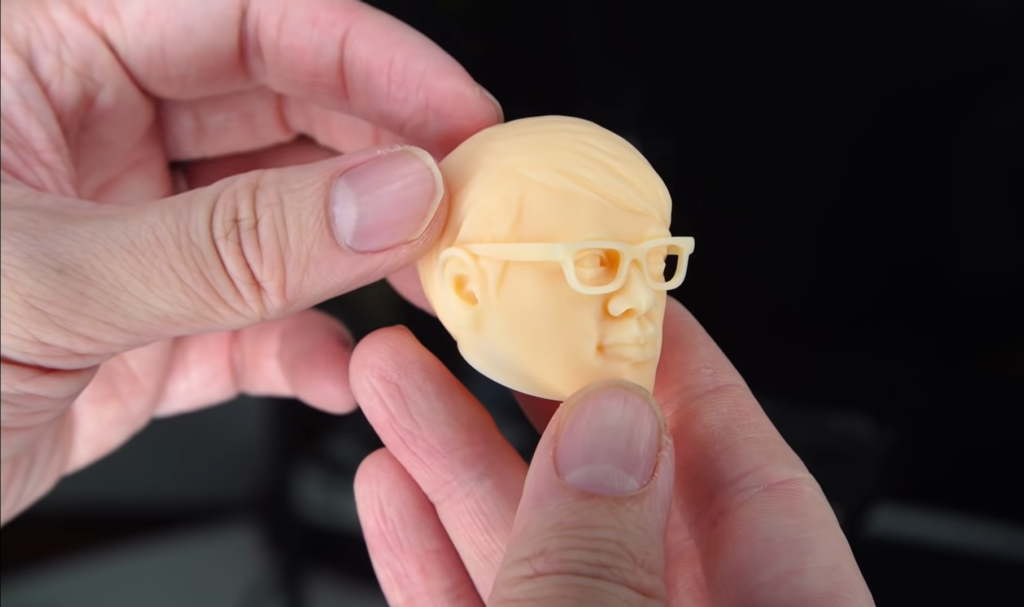
Printing other miniature models gave similar results. All the details on the miniatures were always crisply defined and their surface very smooth. We were generally impressed with the overall quality of prints on this Mars 2 Pro despite it having a slightly lower XY resolution than the Mars Pro. In all fairness, the quality of the prints from the two printers is nearly indistinguishable. The difference can only be spotted under the microscope – the Mars Pro generally gives a better surface finish on its prints.
Based on the results from our test prints, the Mars 2 Pro like its predecessor is a great option for creating highly detailed miniature models. It handles them almost effortlessly and with fewer failures.
We’ve made over 20 different prints on it and up to now we are yet to have any complete failures – we only had a small issue with one of the models where the supports left small pockmarks on some of the points where they had been attached. Other than that, all the other prints came out perfectly.
The most significant improvement that the Mars 2 Pro offers over its predecessors is faster printing speed which is attributed to its new monochrome LCD display and light source.
The Mars and Mars Pro models use an LCD screen with the RGB color filter in which only the blue sub-pixels are actually the only ones that transmit UV light – the green and red ones mostly block the light because they don’t have the right wavelength. Therefore, only the blue light gets to cure the resin which means that nearly two-thirds of the light that’s produced has no effect.
The monochrome screen of the Mars 2 Pro, on the other hand, has no color filter hence it lets much more UV light to pass through, so all the pixels are used to expose the resin which reduces curing time and thereby effectively makes the printing process faster compared to the RGB-based printers.
To put it into perspective, the Mars Pro model reduced the cure times of the original Mars model from the default 8 seconds to 6 seconds which was largely attributed to its upgraded lighting system (Matrix UV lighting). The Mars 2 Pro, however, cuts this time down even much further as it takes just around 2 to 2.5 seconds to cure each layer which is a huge improvement and time saver.
For instance, printing the two rooks took about an hour and 40 minutes whereas the Mars Pro took up to 3 hours to complete them. The Deathtrooper model was printed in roughly 5 hours and the Pascal Blanche’s Space Zombie model took just over 8½ hours. There’s definitely a huge improvement in the cure time as both of these models would take almost twice the time to print on the previous Mars printers.
The Mars 2 Pro has a build volume of 129 x 80 x 160 mm which is a slight increase on both the Mars Pro and the Original Mars model which offer a build volume of 116 x 65 x 150 mm and 120 x 68 x 155 mm respectively.
This increase is yet another worthwhile upgrade as it gives the Mars Pro a slightly more print volume to allow you to generate decently sized prints, instead of just the tiny prints like in the Mars and Mars Pro. The real benefit is actually in the increased XY plane as it enables you to print several small parts simultaneously.
Elegoo has also changed the print plate coating from the CD-like concentric texture on the Mars Pro to a coarse, sandblasted texture that was on the original Mars model’s build plate.
This 180 turn back to the roots was meant to provide even better adherence but having spent time with the two printers, we can say there’s not much difference between the two textures. The prints adhered very well to the Mars 2 Pro plate just as they did on the Mars Pro’s plate.
However, the adhesion is much stronger for models with a solid bottom as was the case with the rook test prints. They stuck a bit tight to the plate although we had no problem removing them.
Several users did report having a hard time extracting their prints off the plate though while others mentioned that their prints would barely stick to the print plate but would instead end up sticking to the FEP. We’re yet to encounter such a problem but it seems it’s not an isolated case because there were many users on different forums that we checked who reported having the same issue.
Similar to its predecessor, the Mars 2 Pro can work with any 405nm UV resin from both Elegoo and other brands. For most of our test prints on this model, we used mainly the Siraya Tech fast cure resin, especially the cream-colored one. We opted for it because we were able to print with it successfully several times on the Mars Pro and it showed a lot of detail much like Elegoo’s water washable ceramic grey resin.
Generally, there is a wide range of resins that you can use with this printer including tinted, transparent, opaque, and specialty resins. You should get great results with most of them although some will still require some extra tweaking before they can work properly.
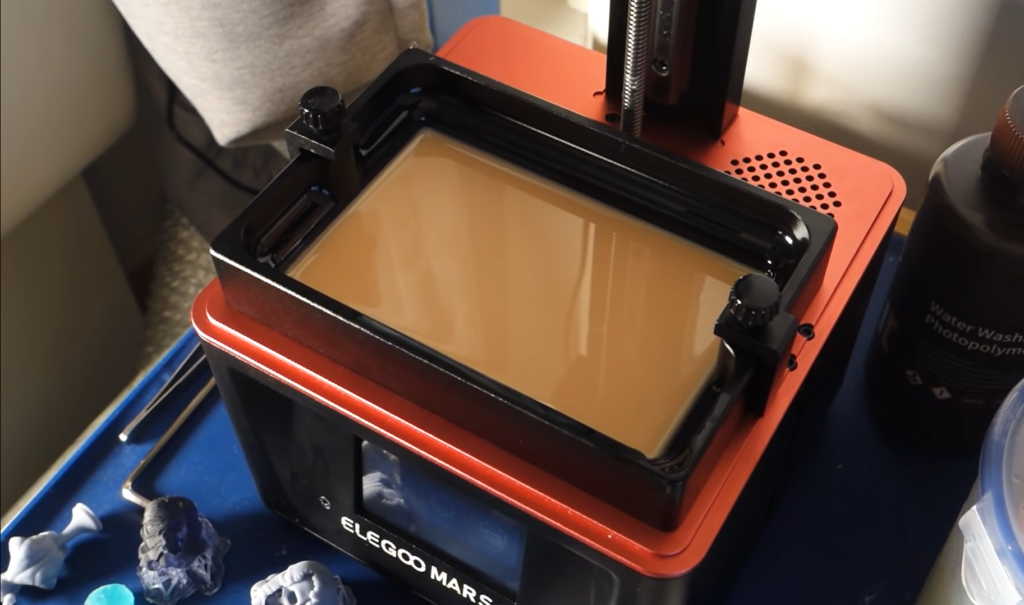
The Mars 2 Pro also comes with a large capacity resin vat much like its predecessor, so you have a longer printing time between refills. Elegoo has equally added a “Max” line on the side of the vat to show the maximum fill level where you can pour the resin – we really appreciated it as it helps prevent overfilling the vat which can lead to spilling of resin over the sides when the build platform lowers into the vat.
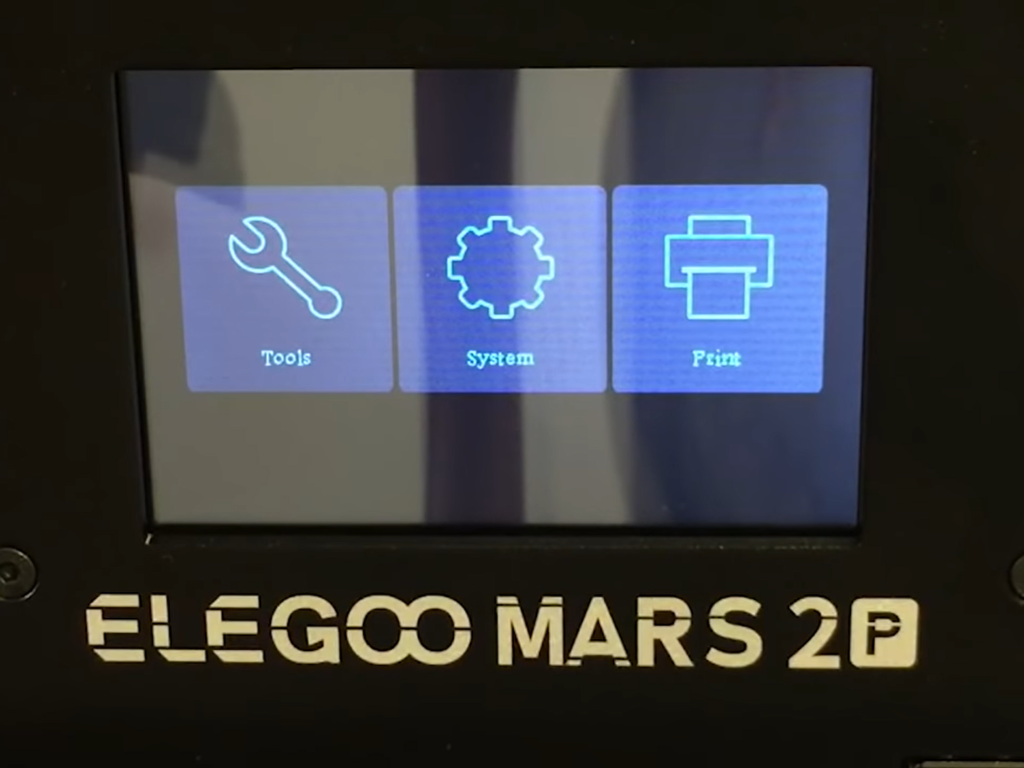
The control panel of the Mars 2 Pro is no different from that of the Mars Pro. It’s the same 3.5-inch full-color LCD touchscreen with the same simple menu that offers basic settings like homing the machine, setting the Z-axis zero position, enabling exposure, initiating printing, and so on. It’s basically similar to the Mars Pro touchscreen in every aspect.
The only thing that has been added is more language choices. It’s equipped with an additional 10 new languages bringing the total to 12 different languages that include English, French, German, Spanish, Dutch, Italian, Portuguese, Russian, Turkish, Chinese, and Japanese. Having all these language choices makes it very versatile in terms of usability as consumers around the world are able to operate the printer more easily without obstacles.
The USB port has been placed on the front too which like we said it’s a great convenience in comparison to the original Mars model where it was on the back.
As with all Elegoo’s resin printers, this one runs the Chitu firmware too, hence it uses ChiTuBox as its slicer for preparing the models for 3D printing. Like we’ve detailed in the review of the Mars Pro, ChiTuBox has a simplified interface that’s user-friendly for even beginners.
It’s easy to grasp if you’ve used 3D software before. It’s a very capable slicer and has most of the functionalities and features to meet the needs of advanced users. You can scale prints down, hollow them out, add supports, and perform other functions to fine-tune your prints as necessary.
The Mars 2 Pro as well benefits from ChiTuBox’s new lightweight .cbt file extension which offers better performance, particularly when printing larger or intricate models since the files are exported at just a fraction of their size.
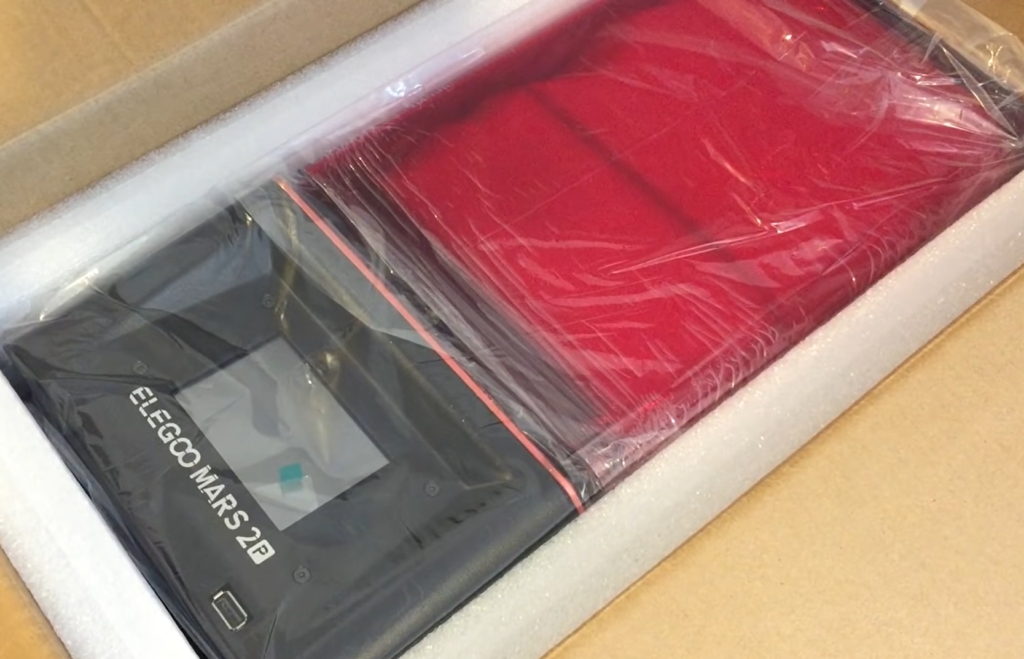
The Mars 2 Pro came packaged efficiently like its predecessor. Everything arrived intact. Inside the box, you find the printer, and inside it is all of the accessories you need. Both the masking LCD and resin vat were shipped with protective stickers attached to them which were easy to remove.
Once you have everything unboxed, set up is super easy as the printer comes fully assembled – you just remove the protective packaging and plug the printer into the power supply. From there, you just attach the build platform to the Z-axis rail and level it, and then place the resin vat, and load it with resin.
The base of the printer has a groove in it that allows the resin vat to self-locate and properly sit flush with the LCD screen. However, the bottom of the vat is also flush with the FEP film hence makes it a bit awkward to lay the resin vat down without really putting pressure on the film.
Leveling the build plate is straightforward like on the Mars Pro. You remove the vat, put a sheet of A4 paper between the build plate and the LCD screen, loosen the plate’s tension screws, and then home the platform (by clicking “move Z-axis to zero”) before tightening the screws and then setting this position as the new “zero”.
It’s a super easy process – the printer basically levels itself, only requires tightening the two set screws back up once it has self-leveled. The set screws themselves are the same large ones found on the Mars Pro plate, so they ensure a more stable and long-lasting leveling result.
The densely packed box comes with almost everything you need to start printing right away. The package includes the printer, the build platform, resin vat, 2GB USB disk, rubber gloves, face masks, a pair of scrapers, paper filters/funnel for filtering resin, power adapter, silicone rubber seal, measuring cup, drip bracket, instruction manual, and tool kit which contains the Allen wrench, screwdriver, and some pliers. The only thing missing is a bottle of resin.
The printer and the build platform clean up easily once printing is complete. You can use either tissues or ethyl alcohol to clean them. The included drip bracket allows you to mount the build plate at an angle after printing to help safely drain the excess resin back into the vat which makes scraping off the rest easy.
The build plate also has just a slight taper to it that allows the resin to drip right off the edges while printing – this prevents the resin from pooling during printing which makes cleaning easier and as well allows you to reclaim most of the resin after you’re done printing. The resin vat is quite easy to clean too – you just use a microfiber cloth to wipe down the tank and tray and then you spray them with ethyl alcohol or any other 95%+ alcohol-based solution.
The biggest challenge is maintaining the carbon filter and the cooling fan because like in the Mars Pro, there’s no easy way to access both of them. The carbon filter is installed in the back base and there’s no panel that you can remove to get to it – other printers usually have a top-mounted filter and fan for easy access.
The filter itself has a lifespan of 6 to 8 months, so once it’s used up then it is back to unfiltered air unless now you get another one as a standalone unit and retrofit it onto the printer. This was the same problem we had with the Mars Pro model and even the fan assembly is hard to access and clean because there’s no way to disassemble the unit.
The other part that seems to pose a challenge as far as maintenance is concerned is the monochrome LCD display. It’s thermally stable and has a long lifespan (over 2000 hours) than conventional LCD displays which means it needs to be replaced less frequently.
The downside though is that it has no protection in the form of a layer of tempered glass like the Mars and Mars Pro’s screens. As such, it’s highly susceptible to scratching or getting damaged, especially when sliding the vat in or out which is something you would be doing quite often. So, despite the longer service life, you are likely to replace it more frequently if you’re not careful – the good thing is that replacement LCD displays are readily available.